For any software installation, the first and foremost thing you would need to know is what type of CPU is installed/being used in your system. In general, there are two types of processors
- 32 bit
- 64 bit
- search "this pc" ( or "my computer" if using windows 7 or older versions) from your system taskbar
- right click on "this pc" or "my computer" and select properties option.
X86 = 32 bit CPU (86 comes from the name of architecture like from 8086 processors)
X64 = 64 bit CPU
Java Installation:
Search for "Install java jdk"
you can download java latest version but if you want to download java 8 version or any other specific version, click on java archive
scroll down and you will find each version download link on right side as shown below
Download X64 - Java SE JDK. (Java Standard Edition)
Install or run .exe file that is download. (downloaded file will be like jdk-8u341-windows-x64.exe)
After Installation, follow below steps to verify version
Press Win + R to open the RUN Prompt
type cmd and press enter key to open command prompt
in command prompt enter below command to verify the version
java -version
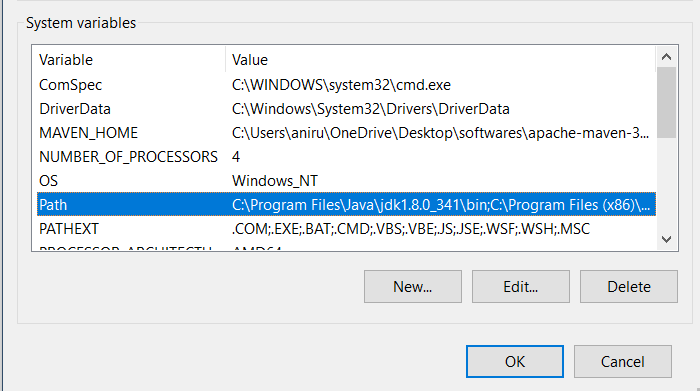
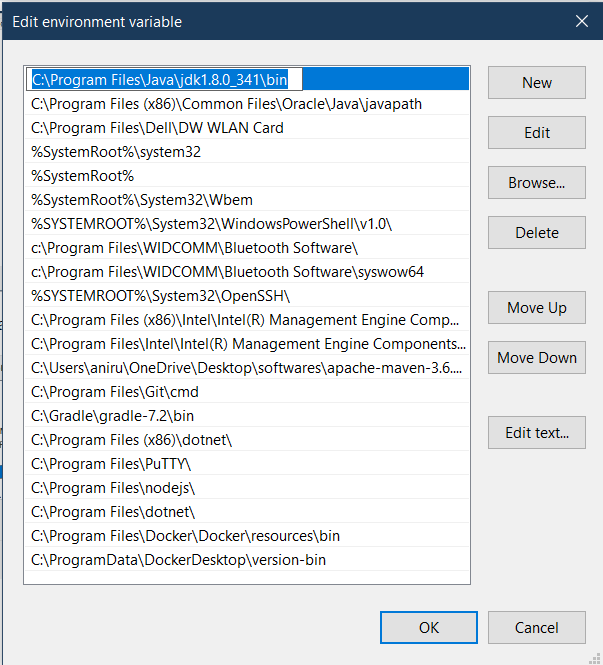
Java Path Configuration: Add C:\Program Files\Java\jdk1.8.0-341\bin in environment variable's System Variables path Variable.
To set java path, search "environment variable" in your system taskbar.
click on edit environment variables
Click on Environment variables
Select path under system variables and click on edit option


No comments:
Post a Comment